

How To Use Vs Code
If you lot need to add an SSH primal to VS Code to gear up up an SSH connexion using key exchange, this tutorial is for you. In this tutorial, yous're going to learn, pace-past-pace, how to configure VS code to connect over SSH via key commutation for both a user with sudo rights (homelab in this guide) and the congenital in root user.
Prerequisites
- Visual Studio Code for Windows. This tutorial will be using version 1.v.ane.one.
- Windows ten (SSH is needed and comes pre-installed)
- A remote SSH host – This tutorial volition be using an OpenSUSE host with SSH enabled.
- You've already set upward an SSH Host in VS Code (run across this article).
Creating the SSH Key
To begin, you'll first need to generate a private and public SSH key on your Windows machine.
- Open up PowerShell on your local computer and run ssh-keygen. The default path for your keys is C:\users\<user>\.ssh.
- Provide the folder path to save the private and public fundamental. The default is C:\Users\<user>\.ssh\id_rsa.
- Provide an optional passphrase. If you provide a passphrase, this passphrase will be used to encrypt the private fundamental.
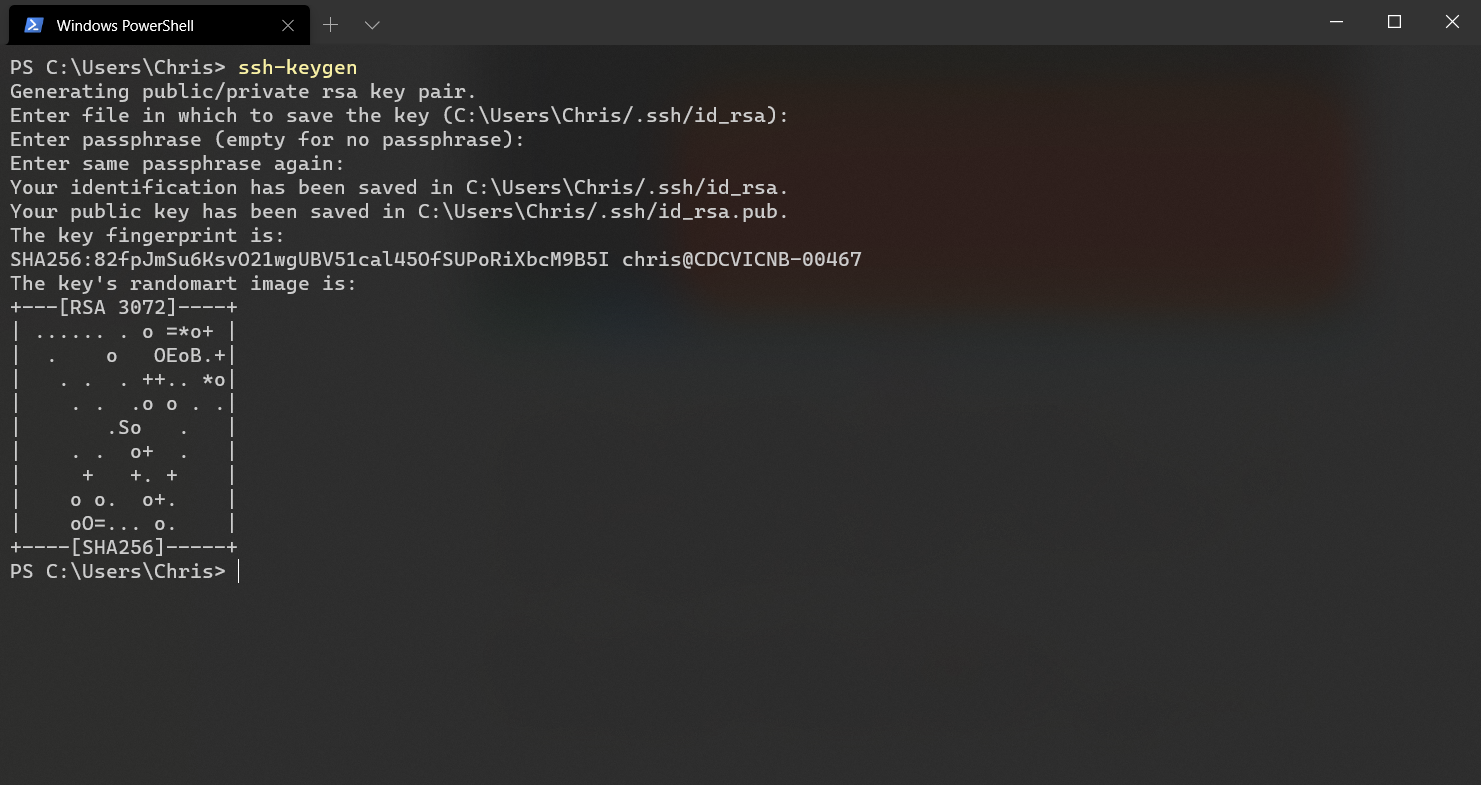
When consummate, yous'll now have two files (keys) in the folder you saved the keys into called id_rsa.pub (public key) and id_rsa (individual key). By default, these keys will be in the C:\Users\<user>\.ssh binder.
Uploading the Public Primal to the SSH Host and Associating your SSH user
You lot'll adjacent demand to transfer the public cardinal (id_rsa.pub) to the remote SSH user'southward authorized keys location. By using VSCode, you tin use its congenital-in explorer to upload the fundamental.
Related: Setting upwards an SSH Key Exchange Connectedness with VS Code and SSH
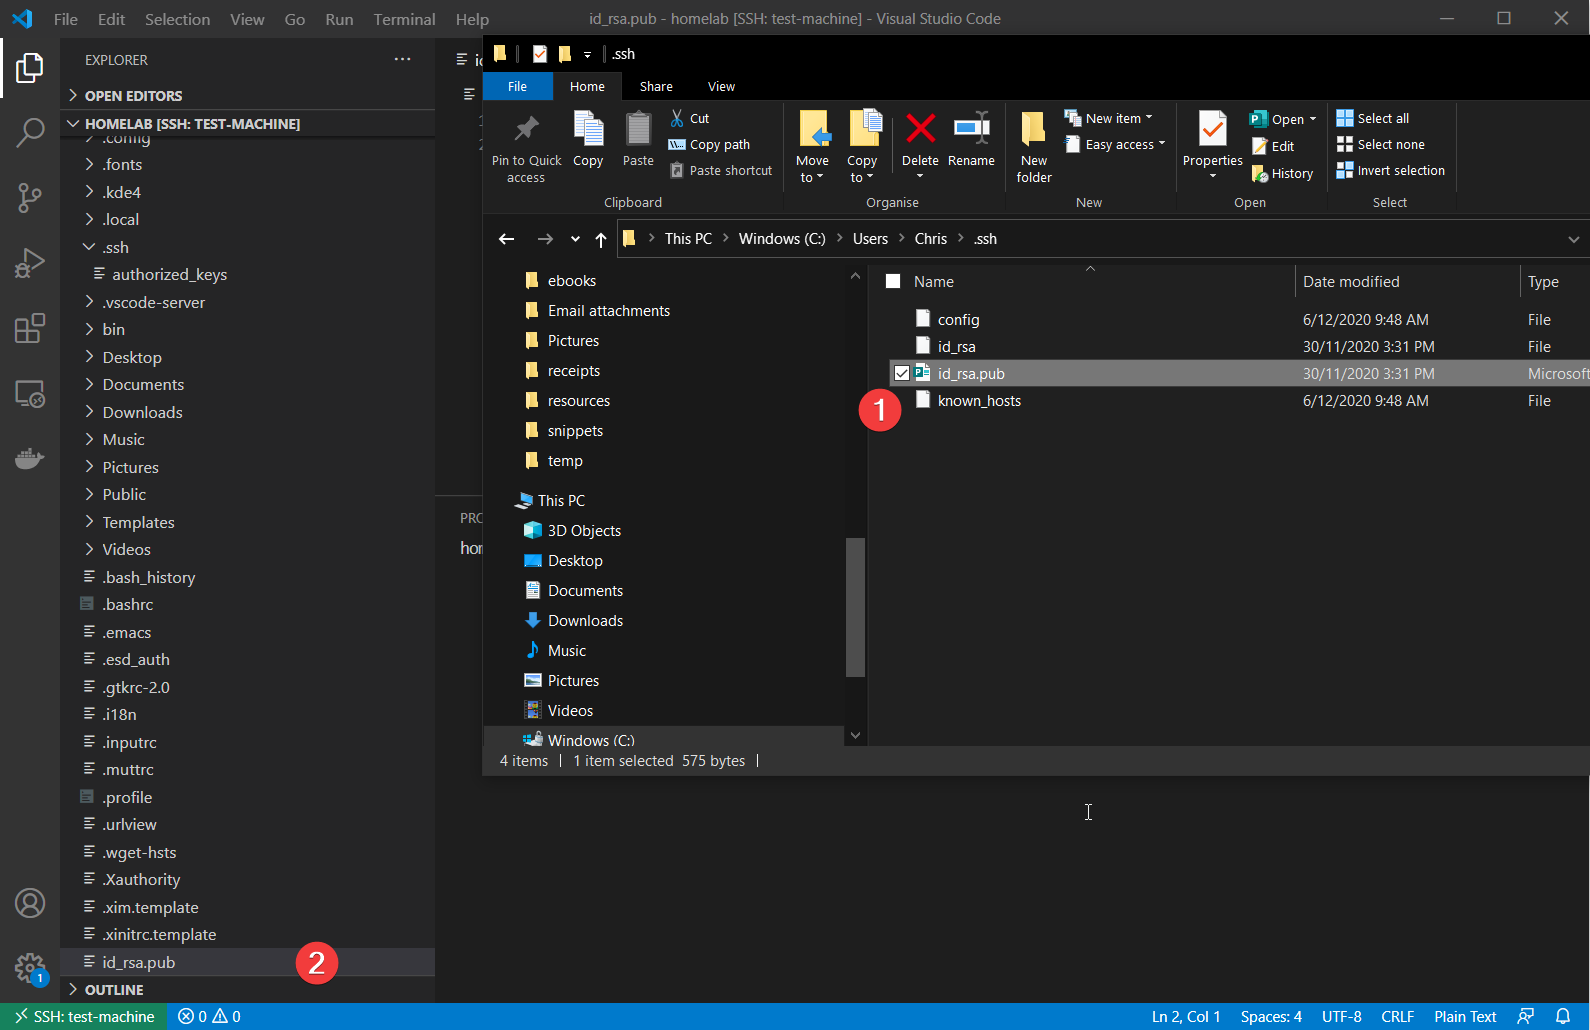
- If yous've already fix an SSH host in VS Code, open upward the abode folder of the user. In this case, the tutorial is using the
homelabuser. - Create the .ssh folder in your dwelling directory and upload the id_rsa.pub file.
- Rename the file to authorized_keys (lower instance). You can run into this example below.
You have now successfully associated your public key with your SSH user. You should be able to reconnect without requiring a password.
Associating the Public Fundamental with the root User
Associating the same key with the root user gives yous the ability to SSH in as either your regular user or the built-in root user.
For the root user this will exist copying ~/.ssh/authorized_keys to /root/.ssh/authorized_keys. Y'all can do so past running the below command:
sudo mkdir -p /root/.ssh && sudo cp ~/.ssh/authorized_keys /root/.ssh/authorized_keys 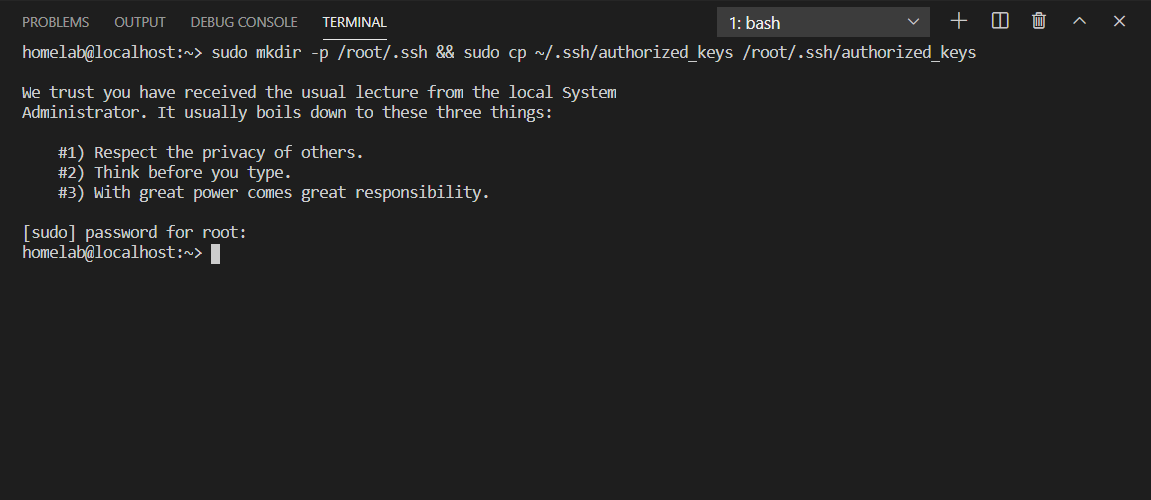
Associating your key with the
rootuser requiressudoauthoritative rights. You can read more than about sudo here.
You should now be able to log into the root user via SSH without requiring a password in Windows.
Graphically Adding your Public Key to the root user using YaST
If y'all are more than of a visual learner, you tin perform the same task using OpenSUSE'south YaST configuration utility. This will be functionally the same every bit copying the authorized_keys file to the root user, in a more friendly fashion.
YaST is a configuration tool that is specific to the OpenSUSE distribution.
Related mail: A Windows Guy in a Linux World: YaST and the Desktop
- Navigate to the VS Lawmaking final and upload your id_rsa.pub file to the home directory:
2. Run sudo yast in the VSCode Concluding.
three. Once in YaST, navigate to Security and Users —> User and Group Management using the arrow keys. Press Enter to enter the Users and Group Management section. This step brings you lot to YaST's user management screen.
iv. Press Alt+S in YaST to alter the filter from normal users to system users.
v. Navigate down to root. Hit alt+i to edit and and then alt+south again to motility to the keys section. Y'all can see that in the animation below:
six. Press alt+a and navigate to the id_rsa.pub file you uploaded before and hitting alt+o to OK. You should run into the fingerprint added to the root user.
7. Go on hitting alt+o to OK out of the menus and finally alt+q to quit. You can run into that in the below animation:
At this stage, you've successfully performed a key exchange for root! At present delete that uploaded /dwelling house/<user>/id_rsa.pub on your Linux host, if yous wish.
Authenticating with the Key
Finally, you lot should test out the connexion using the newly created key. To do that:
Open upwards a PowerShell panel and effort running ssh <user>@<ip> to exam logging in as both your user and the root user. This guide is using the homelab user as the normal user. If all goes well, you should immediately exist logged in to either business relationship. You lot tin can encounter this below:
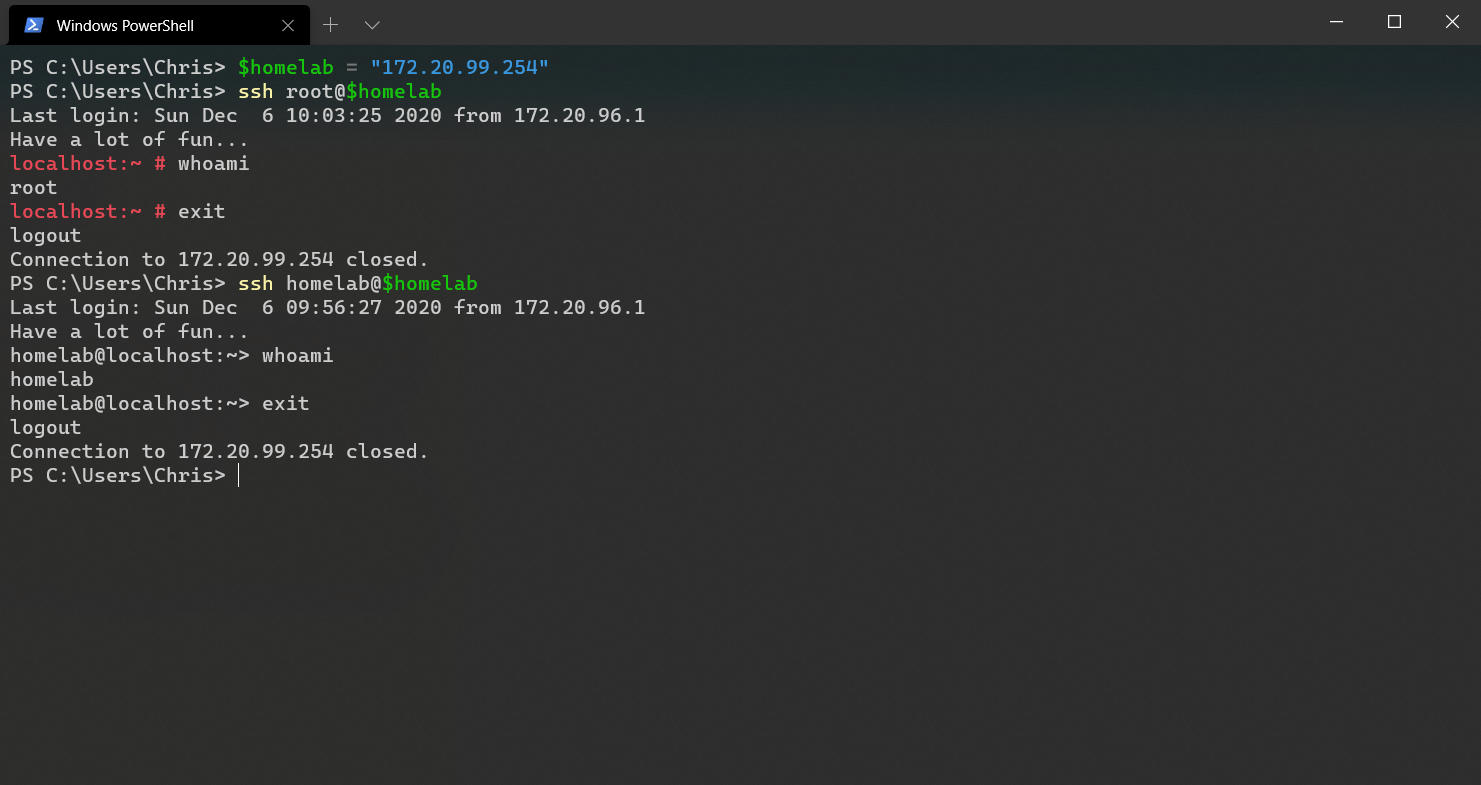
You can at present SSH in as root and the concluding didn't even ask for a password. SSH for Windows knew where to await for your private key (C:\users\<user>\.ssh\id_rsa), and used that automatically to authenticate.
Configuring VS Code to utilize Either User
What if you demand to connect to your remote SSH host using both the root user account and a standard admin user? You can set this scenario upwards using ii different configurations in VS Code.
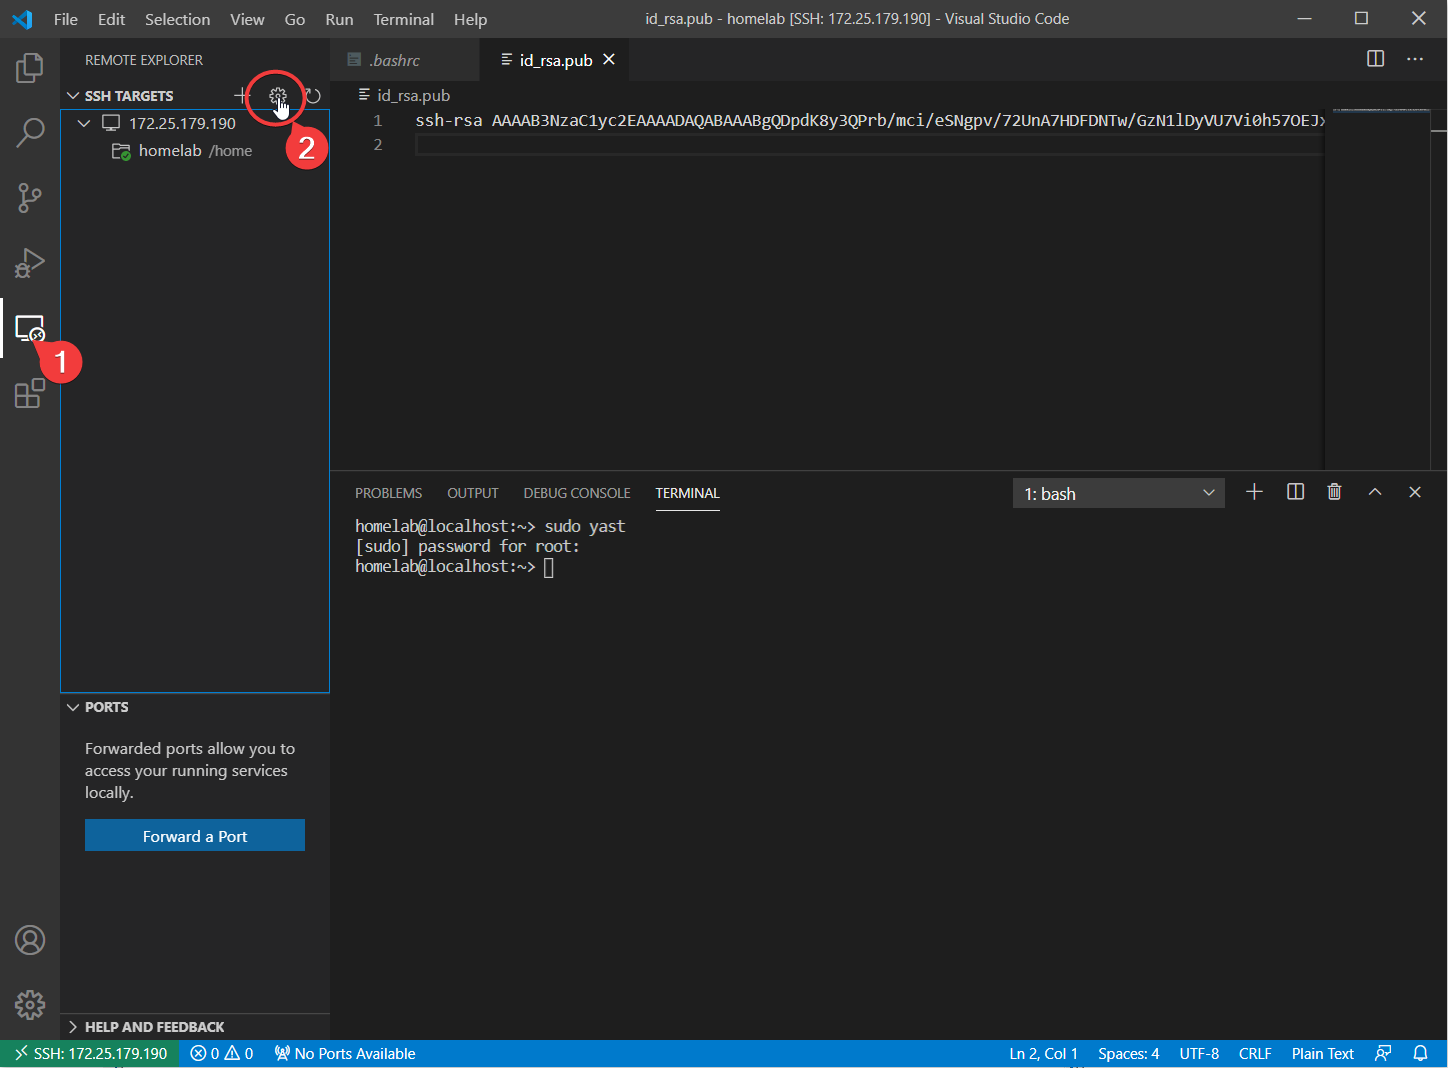
- In VS Code, click on the Remote Explorer icon in the sidebar and click on the cog under SSH Targets as shown below.
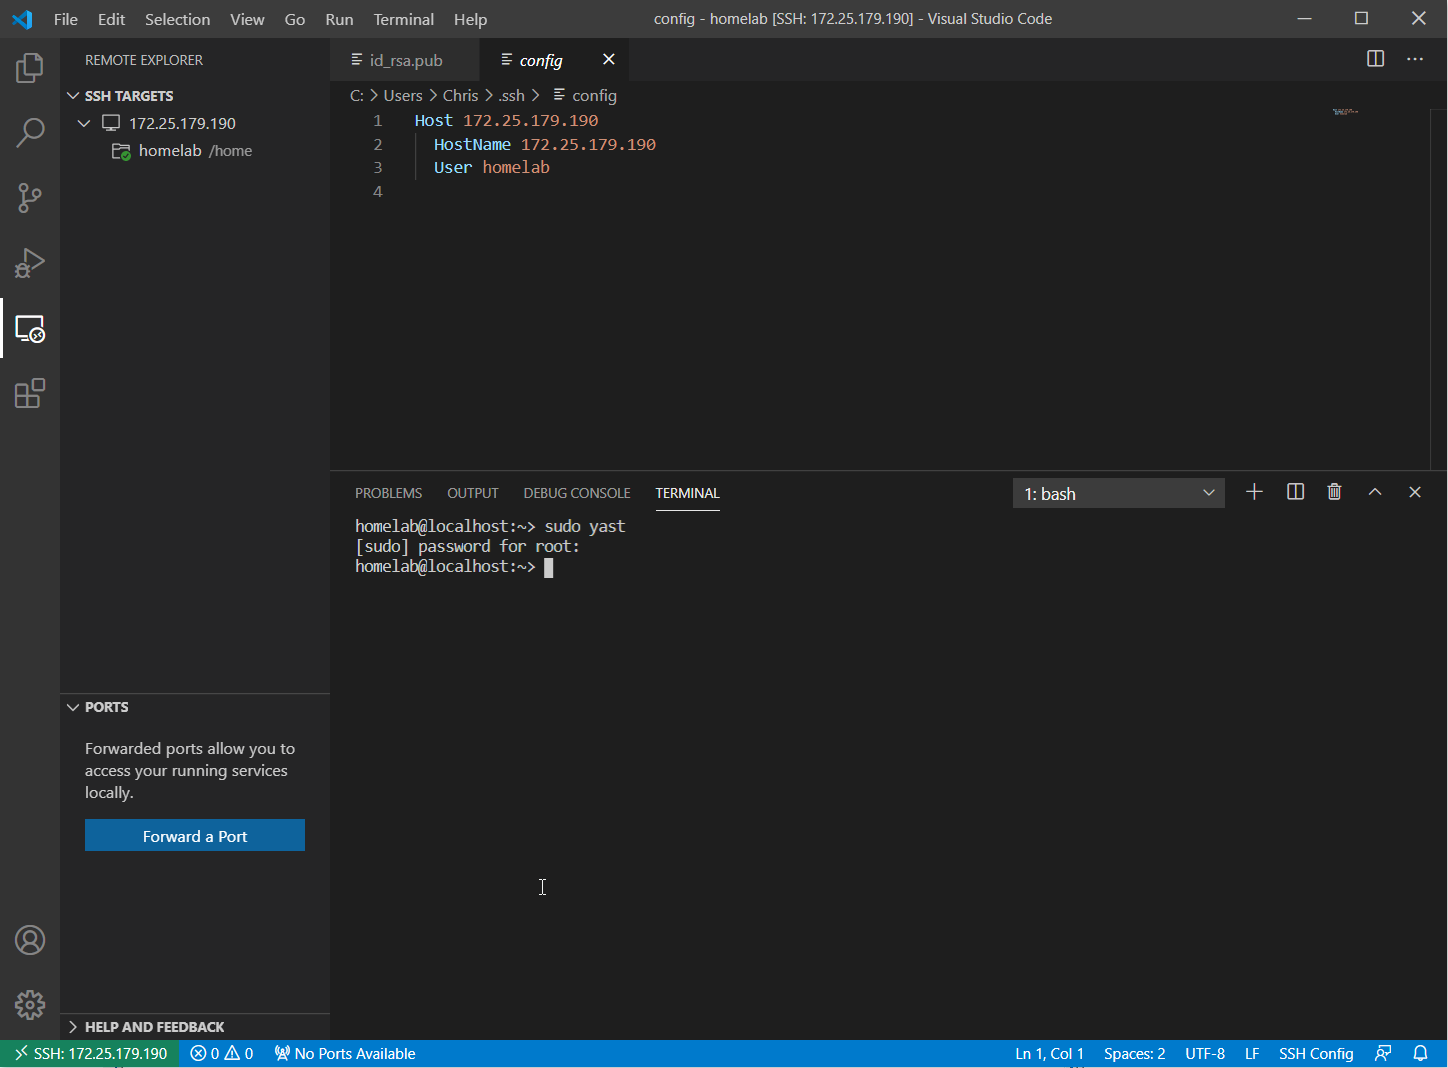
two. VS Lawmaking volition ask for a file to cull. Press Enter to to choose the default file you generated earlier in this article. VS Lawmaking will open up upwardly a config file to edit as shown below.
iii. Copy the start 3 lines of the config and paste them below separated with a bare line.
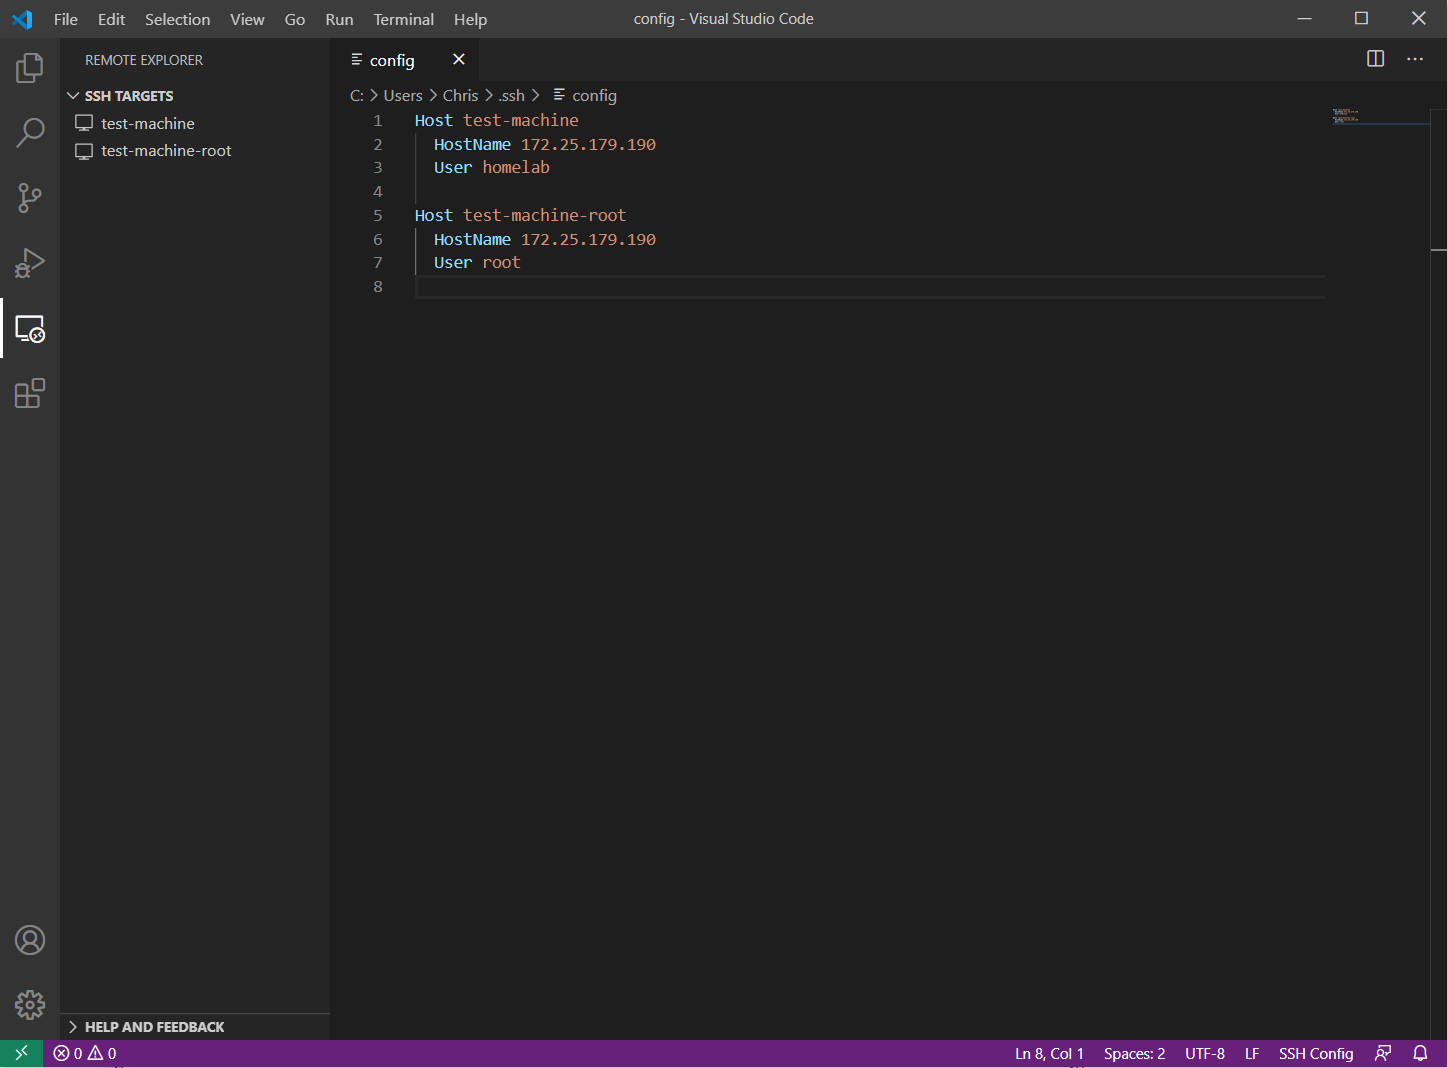
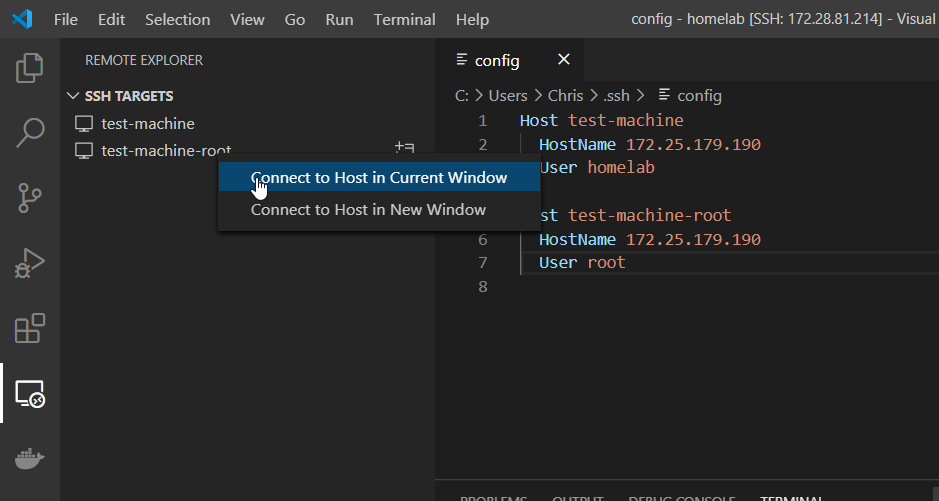
4. Alter the second user from <your user> (homelab in the beneath screenshot) to root. Likewise, give them more than descriptive names (The Host parameter) so you can tell the two configurations autonomously. Press Control+southward to save:
The
Hostparameter is sensitive to spaces and special characters. Proper noun your host merely using hyphens and alphanumeric letters.Hostnameis equivalent to either IP or DNS name. The in a higher place example is using an IP of172.25.179.190
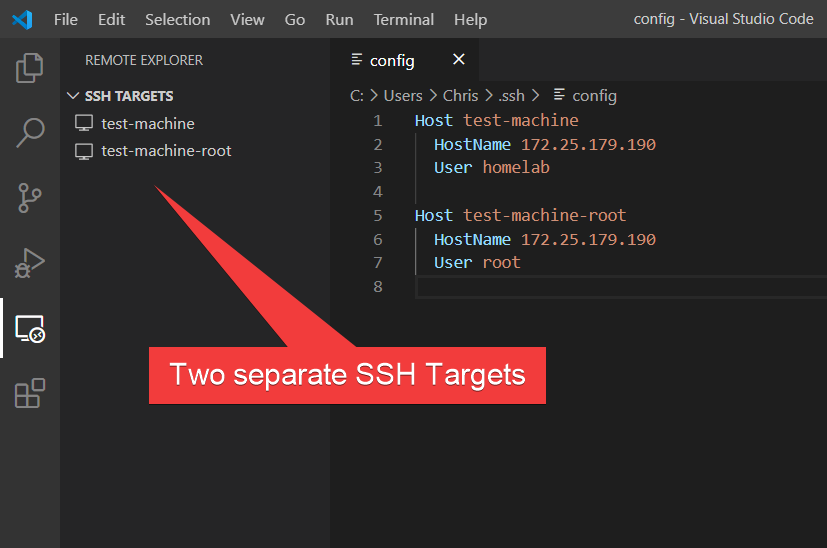
You can now come across (in the screenshot below) you have two SSH targets: exam-machine, and test-machine-root.
5. At present connect to either host by correct-clicking the SSH target and clicking Connect to Host in Electric current Window as shown beneath.
If you connect as root, you have total access rights to your car — including protected files.
If yous Connect to Host in New Window, VSCode will launch a split up instance with the new connection. This lets you have both
rootand<user>open up simultaneously in 2 split up sessions. Do non mix upwards which is which!

How To Use Vs Code,
Source: https://adamtheautomator.com/add-ssh-key-to-vs-code/
Posted by: flowersarkly1973.blogspot.com
0 Response to "How To Use Vs Code"
Post a Comment